Preparing to Work Inside the Tiny House
As the outside of the tiny house is almost complete, I’m beginning to plan for inside projects such as electrical and plumbing. There is much to do in those systems. However, the inside must be ready first. Before any inside work starts, there are a few things to do and double check.
- Will everything fit as planned?
- Framing the fenders
- Add threaded rods for more stability
- Does the inside leak?
Will everything fit as planned?
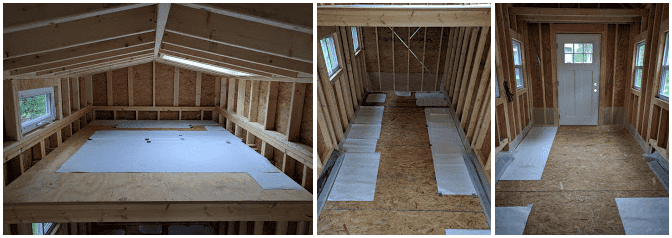
When first designing the rough layout of the tiny house, I created paper cutouts to represent the counters, appliances, storage areas, and furniture. I carefully placed them on the floor to get an idea of how the tiny house interior would look and function.
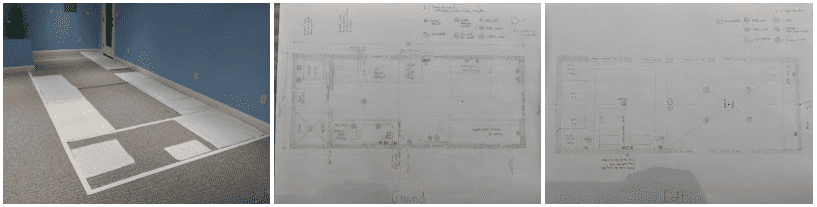
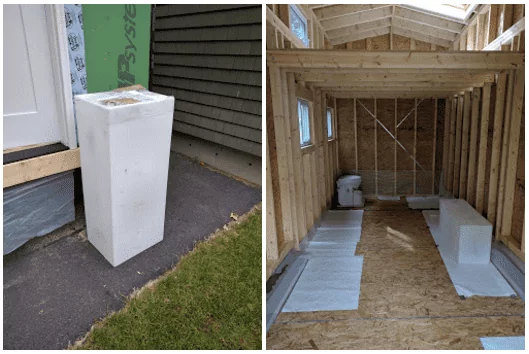
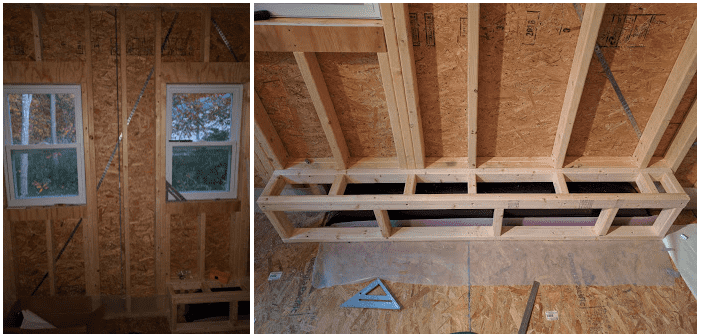
Recently, I took the original cutouts and placed them in the tiny house to see if everything still fits as planned now that the fenders are framed. 2″ x 3″ (38 mm x 64 mm) rough lumber was used to minimize the loss of space due to the fender framing. However, there are a couple of adjustments due to minor miscalculations regarding the fender’s size and window layout.
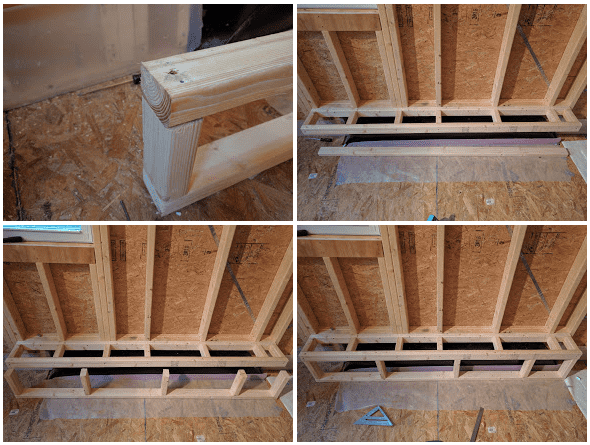
The framed fender boxes are pretty close to the original design. However, one fender will be partially under the custom couch a few more inches then originally thought. The second fender pushes the water tank a couple more inches toward the cabinet doors. Overall, this sacrifices a small amount of storage space under the counter and in the couch. On the other side, the fender moves the stairs a couple inches closer to the middle aisle.
Secondly, the windows in the great room are closer together then the original design. Although I don’t want a TV in the tiny house, the plans would allow for a 27″ TV or monitor between the windows. Now, the space can only accommodate a 22″ TV or monitor.
Threaded Rods for Additional Stability
I can never have enough structural support in the tiny house. Up until this point, there are carriage bolts that secure the floor and main floor frame to the trailer, and metal hanger strapping that wraps the outside frame at the corners.
For additional stability, threaded rods run through the trailer all the way up through the loft floor frame. There are a total of four rods, one near each corner of the tiny house.
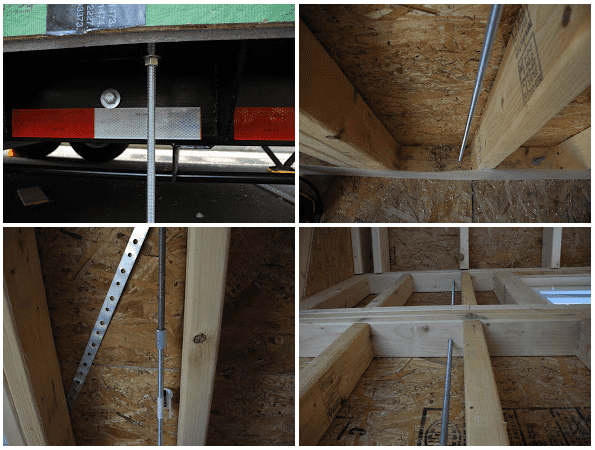
Each rod is two 6 foot (~ 183 cm) threaded rods connected with a coupler to make a single rod 12 feet (~ 366 cm) in length. Each end of the threaded rod is tightened with a washer and 3/8″ (~ 10 mm) nut. The extra length of rod below the trailer (top left photo) is cut as short as possible.
Does the inside leak?
Several rainstorms have come and gone since the tarp was packed away for good. However, there was one minor leak on the left side of the tiny house. The seal between the fenders and sheathing did not have any silicone caulking to prevent water from entering.
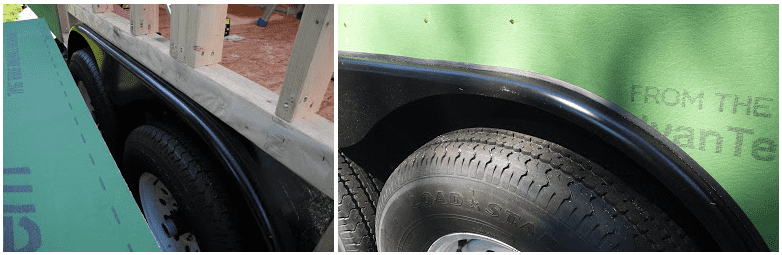
The rubber seal was not completely against the sheathing, and a small amount of water dripped behind it. Luckily, there is no damage or water leakage into the subfloor. The solution is simply to caulk the area on the outside.
Otherwise, the windows and door have been dry and the roof doesn’t appear to be leaking in any way. This is good news since there won’t be any worries when its time to close the interior walls.
Ready to Move Forward
Overall, the tiny house is in great shape to start the interior work. There are few exterior touch ups to do, but then its full speed ahead inside until the weather is suitable to put up siding on the outside. I’m still very much enjoying this challenge, and I can’t wait to see more progress.