The Adventure of Subfloor Construction
There are many layers to a tiny house floor, and it’s easy to underestimate the time and resources required to complete the task. Properly planning what materials and tools are necessary will help achieve success.
Scope of Work
[Google Photo Album of the Floor Framing]
While preparing for this stage of construction, it was easier to break down the job into smaller tasks. This insures each step is completed properly and accurately. The steps for this phase of construction are as follows:
- level the trailer
- install flashing
- add the underlayment
- frame the floor
- secure the floor frame to the trailer
- insulate the floor
- add a vapor barrier
- install the subfloor
- celebrate!
Level the Trailer
The first step before any construction begins is parking and leveling the trailer at the building site. The tools used are a level, a set of 4 scissor jacks, and jack pads. Each corner is adjusted one at a time, and then double checked with a level.
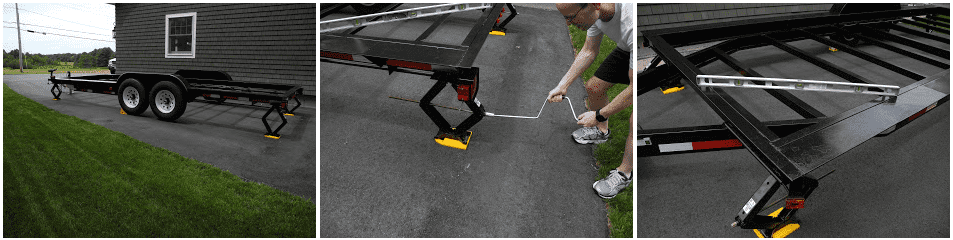

The hand crank works well when making very small adjustments. To quickly raise and lower the scissor jacks, a scissor jack socket can be attached to a standard electric drill. Currently, the scissor jacks are not permanently attached to the trailer. However, the intention is to bolt (not weld) the jacks to the trailer.
Flashing
Flashing is a thin sheet or strip of water-resistant material that is typically installed at roof intersections, windows, doors, and along the tops of foundation walls. This directs water flow away from a home.
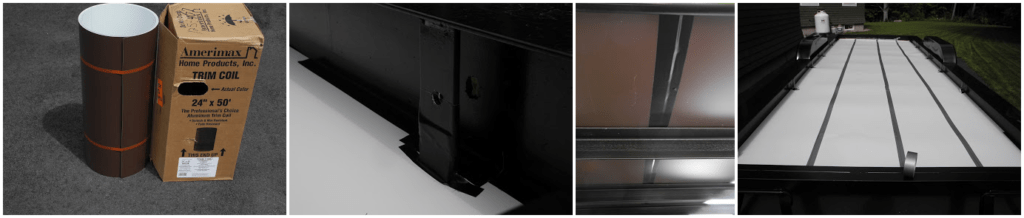
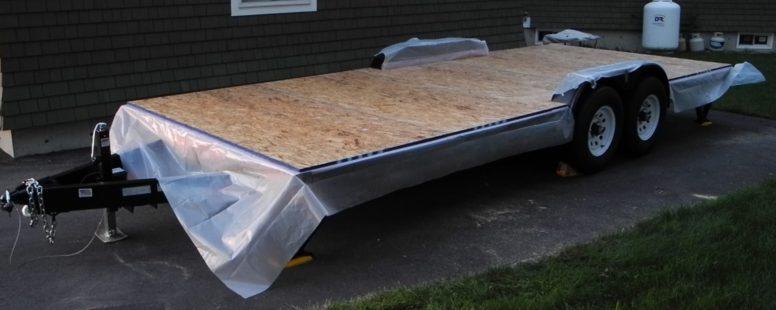
In this tiny house on wheels, flashing keeps water away from the underside of the trailer. Two boxes of flashing lay across the entire trailer length. Four lengths of 19′ 6″ (~594 cm) flashing are taped together above and below each seam.
Each layer overlaps the other layer. This way if water penetrates a seam, it would be difficult to reach the insulation.
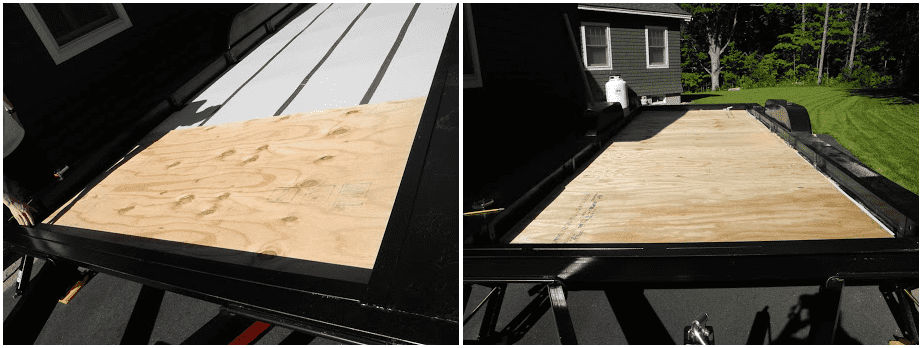
Underlayment
Underlayment smooths minor imperfections in the subflooring surface.
Although underlayment may be necessary with the finish floor, in this case the underlayment exists between the flashing and the floor framing to provide a level surface for the insulation. Five sheets of 11/32″ x 4′ x 8′ (~8.7 mm x ~122 cm x ~244 cm) plywood make up the underlayment layer.
Framing the Floor
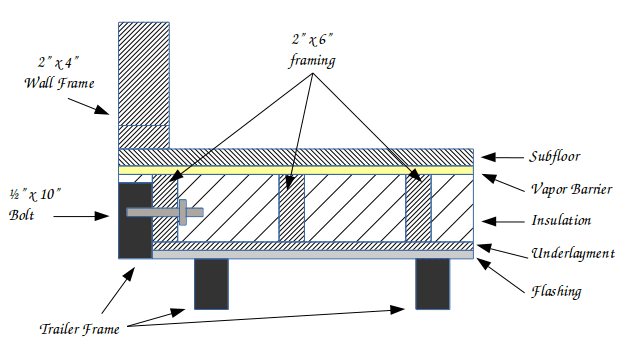
The framing uses 2″ x 6″ (~5 cm x ~15 cm) lumber. Each floor joist is 16″ (~41 cm) apart on center. Twenty one 2″ x 6″ x 8′ (~5 cm x ~15 cm x ~243 cm) studs make up the frame. The frame is nailed together with the exception of the corners. The corners attach together with deck screws.
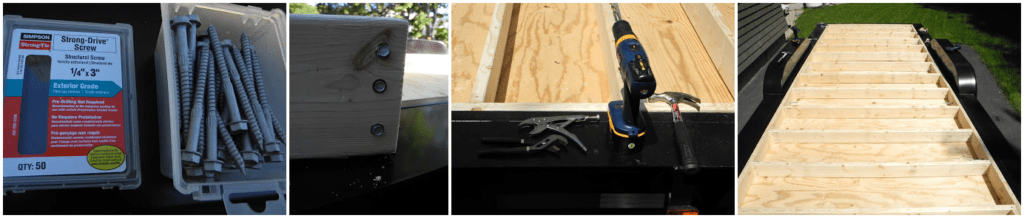
The frame was assembled piece by piece within the trailer framing to insure an accurate and snug fit for each joist.
Securing the Floor
With the frame complete, the next step is to drill into the frame and secure it to the trailer. This type of trailer installs the floor into the trailer to provide additional head room inside the tiny house.

Twelve 1/2″ x 10″ (~13 mm x 254 mm) bolts secure the flooring to the trailer. In retrospect, 6″ (~152 mm) bolts would reduce the excess length in the floor. Each bolt uses two washers at the trailer frame and between the nut and wooden frame joist. Bessey Bar Clamps 12″ x 5 1/2″ (~30 cm x ~14 cm) pull the floor frame even with the trailer so the floor framing and trailer framing are flush (i.e. at the same height).
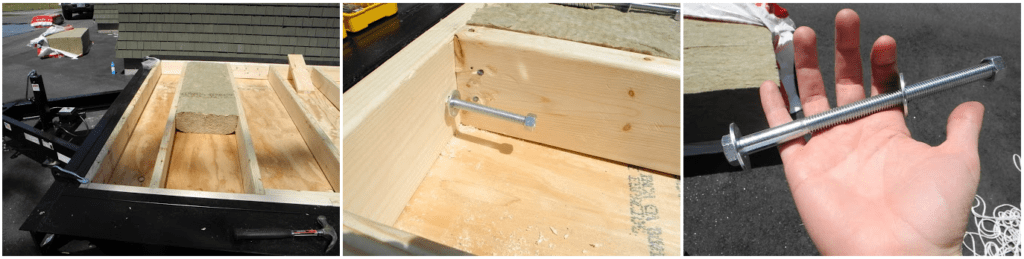
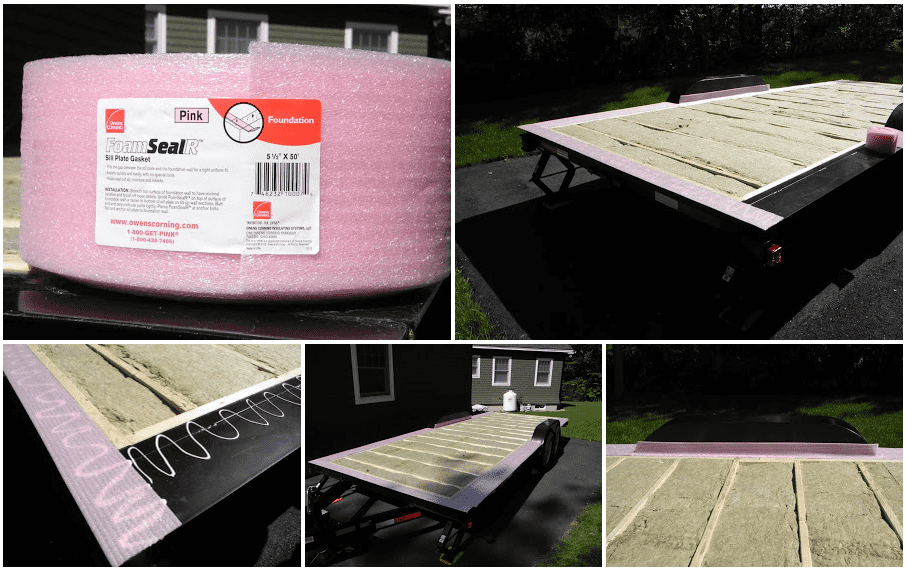
Insulating the Floor
3 full packages of ROXUL R23 ComfortBatt insulate the tiny house floor. ROXUL is easier to install, it’s more fire resistant, provides greater water resistance, and provides better sound absorbency then other conventional insulation products.
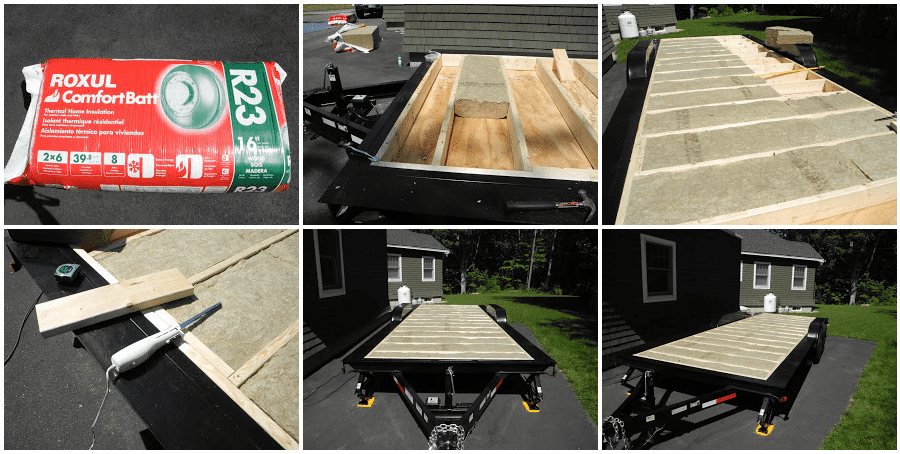
Additionally, sill plate gasket lines the top of the trailer where the subfloor touches the metal trailer. Since steel and wood are terrible insulators, the sill plate gasket will help stop outside temperatures from entering the tiny house.
It’s important to make sure the adhesive does not melt the material. Loctite Power Grab Express All-Purpose Interior Construction Adhesive works well for this purpose. First, it is applied to the trailer’s flange. Then, the sill plate gasket is carefully lined across the trailer. Each roll is 50′ (~15 m) in length. One and a half rolls were used.
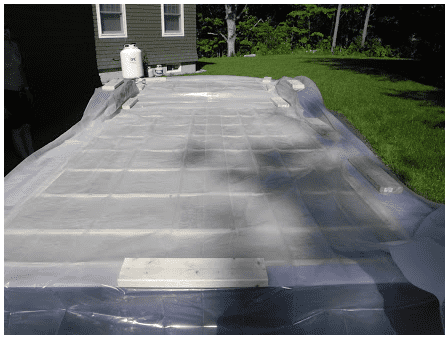
The Vapor Barrier
A vapor barrier is a thin layer of impermeable material, typically polyethylene sheeting, that prevents moisture from damaging the fabric of the building. In this case, a vapor barrier is between the insulation and the subfloor. One 10′ x 25′ (3.04 m x 7.62 m) 6 mil thick sheet fits over the entire floor area. The excess vapor barrier hangs off the edge. It remains uncut for now.
Laying it flat with the assistance of extra wood helps avoid major wrinkles. Staples hold the vapor barrier in place.
The Subfloor
The subfloor is 23/32″ x 4′ x 8′ (~18 mm x ~122 cm x ~243 cm) Tongue & Groove OSB Subflooring Plywood. The trailer is exactly 8′ x 20′ (2.4 m x 6.1 m). Five pieces of subfloor plywood cover the trailer. The only cuts necessary are around the fenders.
A sheet of cardboard makes a handy template that outlines the cut out for the fender. Once cut, the subfloor fits together at each tongue & groove with adhesive.
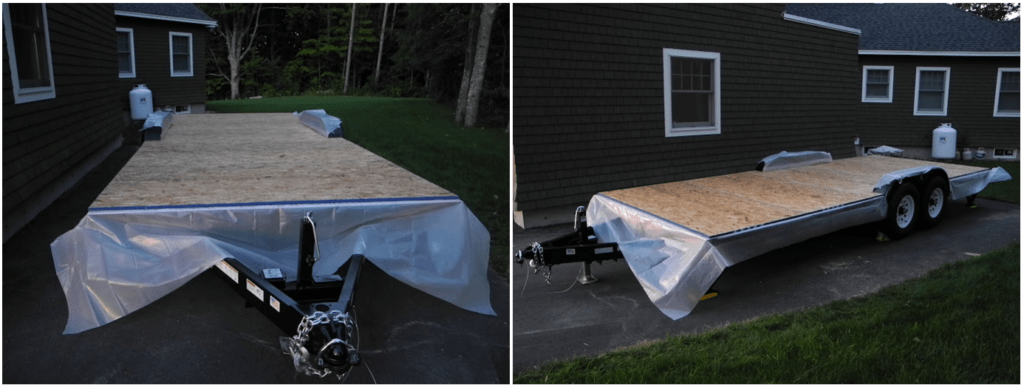
However, the disadvantage of using tongue and groove is a loss of approximately 3/8″ (~10 mm) at each board. Overall, about 2″ (~5 cm) remains uncovered at the end of the trailer. Using the cut outs from the subfloor, a strip is cut and placed across the edge to cover that 2″ (~5 cm).
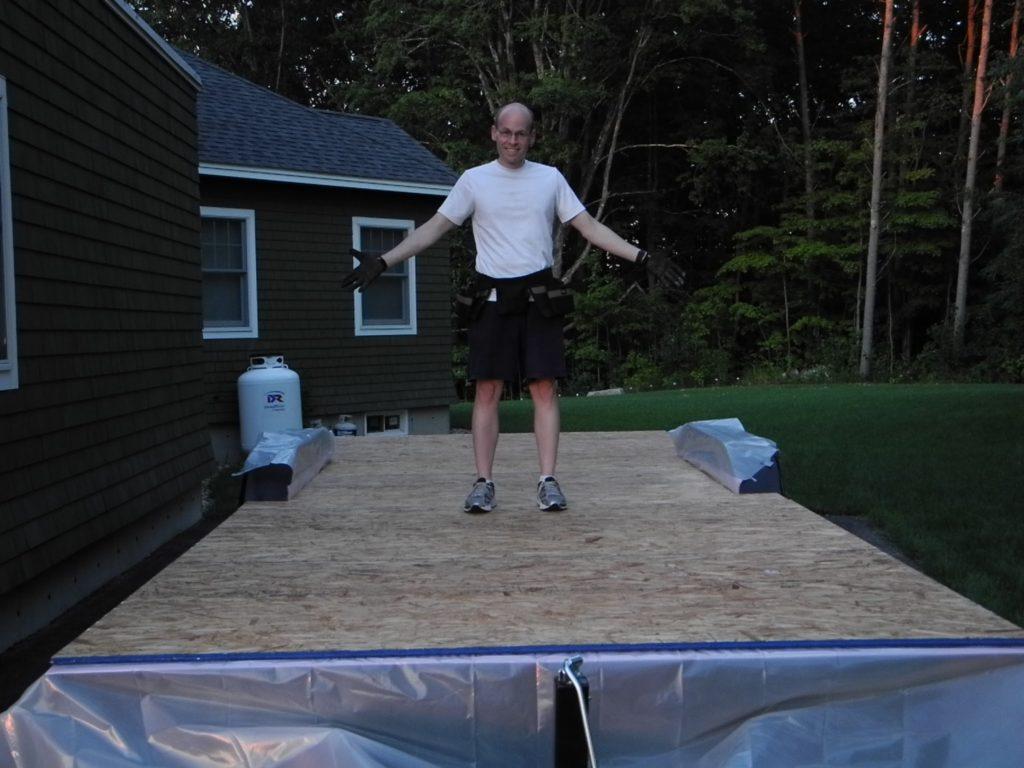
Celebrating
After a hard 13.5 hours of work between two people, the subfloor is complete. With each milestone make sure to take the time to reflect and celebrate the work and treat any friends and family for their efforts.